Marble Sort Level 1 Walkthrough & Solution
Marble Sort Level 1 walkthrough: dodge the checkerboard bait, tap the front Yellow blockers first, and dig out the buried Light Blue clusters step by step.
Levels · 1

Marble Sort Level 1 Walkthrough & Solution
Level 1 Board Overview: The Checkerboard Opener
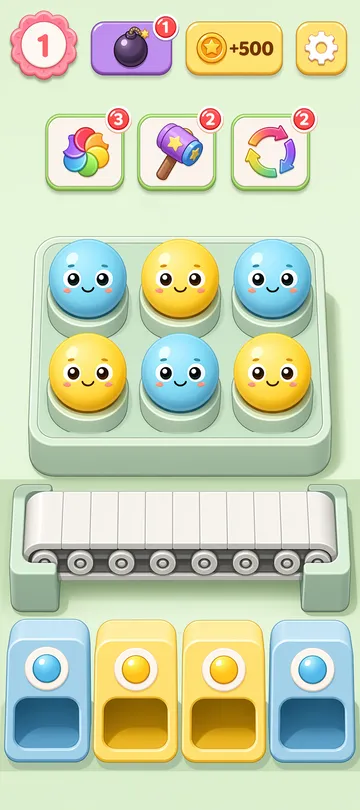
Welcome to the first board. Only two colors in play — Light Blue and Yellow — and the Top Tray is a small 2x3 grid. Looks like a free win. It isn’t, unless you tap in the right order.
The front row reads Yellow, Light Blue, Yellow from left to right. The back row is the exact mirror: Light Blue, Yellow, Light Blue. A clean checkerboard, and that’s the trap.
Down below, the four receiver Boxes want Light Blue, Yellow, Yellow, Light Blue. Do the math: the outer Boxes both want Light Blue, but your front row only holds a single Light Blue cluster — the one in the dead center. The other two Light Blue clusters are locked in the back row behind the Yellow blockers.
The Trap in Marble Sort Level 1
The whole level is one lesson: the obvious tap is the wrong tap.
- Front-left column: Yellow on top of Light Blue. The Yellow has a home; the Light Blue underneath is what the far-left Box wants.
- Center column: Light Blue over Yellow. That front Light Blue is the bait — tap it now and it fills one outer Box, while the other outer Box starves with no way to reach the back row.
- Front-right column: Yellow over Light Blue, same story as the left side.
Dump the center Light Blue early and you’re stuck: one empty Light Blue Box, no legal moves, and a Conveyor Belt you can’t afford to clog. The fix is to work outside-in — clear both front Yellow clusters so the back row opens up, and only then touch the center.
Marble Sort Level 1 Step-by-Step Walkthrough
Two taps crack the whole board open. Don’t overthink it.
Opening: clear the outer Yellow blockers
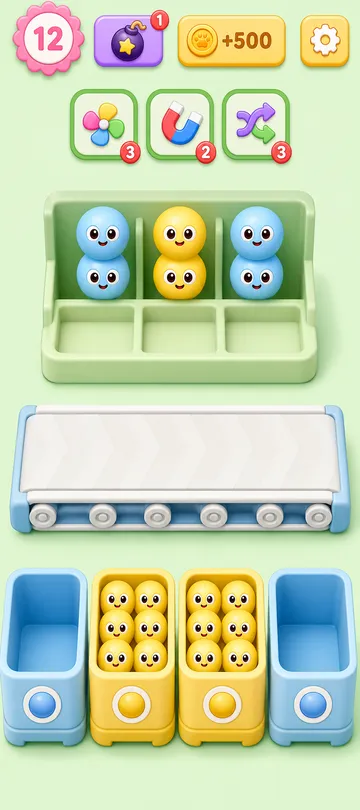
- Tap the front-left Yellow cluster. It rides the belt into one of the middle Yellow Boxes.
- Tap the front-right Yellow cluster. It clears the other middle Yellow Box.
- Stop and look — both back-row Light Blue clusters are now exposed, and your belt is completely empty. That’s the position you wanted.
Cleanup: feed the outer Boxes, then the center
- Tap the back-left Light Blue cluster into the far-left Light Blue Box.
- Tap the back-right Light Blue cluster into the far-right Light Blue Box. Both outer Boxes sink, and a fresh wave of Yellow Boxes slides up front.
- Tap the front-center Light Blue cluster you ignored at the start. It routes into the newly opened lanes.
- Tap the last back-center Yellow cluster to empty the grid. Level clear.
Level 1 Tips Recap
- Count what the Boxes want before your first tap — the front row rarely tells the whole story.
- If a color has no open Box, don’t release it, even when it’s sitting right there.
- Clear blockers first; the marble you actually need is almost always behind something else.
Related Articles
blog
Marble Sort Video Walkthroughs — All Levels on YouTube
Every Marble Sort level 1-20 solved on video — the complete walkthrough series by Rock Gaming Channel, embedded level by level with links to the written guides.
level
Marble Sort Level 10 Walkthrough: Tunnel & Pink Bait
Marble Sort Level 10 walkthrough: dodge the double Pink bait, tick the Tunnel countdown down from 3, and survive the Light Blue wall step by step.
level
Marble Sort Level 100 Walkthrough & Solution
Marble Sort Level 100 walkthrough: rip off the countdown Panels, survive the blind Mystery Box center, and untie the diagonal Connected Boxes step by step.
Was this helpful?
Thanks for the feedback!