Marble Sort Level 419 Walkthrough & Solution
Marble Sort Level 419 walkthrough: route marble stacks through the center yellow tunnel, mind the grey '?' covers, and unlock the receiver tubes with the gold key.
Levels · 419
Levels 460–460
Levels 487–487
Levels 500–500
Levels 517–517
Levels 550–550

Marble Sort Level 419 Walkthrough & Solution
Level 419 Board Overview: The Center-Tunnel Grid

Level 419 is a tall, busy tile-grid board with one feature you cannot miss: a vertical yellow tunnel running through the center column. It is a transit shaft — marbles travel through it from the cells above down to the cells below — so the middle of the board behaves like a pipe rather than a stack. Plan around that pipe and the level opens up; ignore it and your marbles jam mid-drop.
The play area is a wide grid where each cell holds a short stack of matching marbles. At the visible mid-solve state the board still carries stacks in Red, Orange, Blue, Light Blue, Pink, and Brown scattered across the upper rows, with a Purple cell waiting at the base of the yellow tunnel and a Brown stack sitting right above the shaft’s opening. Grey ”?” covers sit beneath several stacks, hiding the cells that come next.
Below the grid, the conveyor carries marble batches toward a row of tube receivers at the bottom. Those tubes fill with sorted colors — Light Blue, Orange, Red, Purple, Pink, and Dark Blue all appear in the tube sections — and their bottom cells stay locked behind grey ”?” covers until the run clears the way. A gold key with a grey lock base rides the board, ready to unlock cells the moment you free it. This is a hard, mid-to-late level where reading the tunnel and the covers matters more than raw speed.
The Trap in Marble Sort Level 419
The board is rigged to make you drop before you can sort. Here is the layout:
- The yellow tunnel is a one-way chokepoint: the center shaft only lets marbles pass in order. Release a stack above it with a mismatched color below and you trap marbles inside the pipe with no way to pull them back out.
- Grey ”?” covers hide the next cells: several stacks sit on covered blocks, so you cannot always see which color the grid owes you next. Tap a covered stack blind and the reveal can land in the wrong lane.
- The tube receivers lock their bottom cells: the lower sections of the receivers start behind ”?” covers, and the gold key is what frees them. Colors you thought were done can reappear once a lower cell opens.
- Mixed stacks invite greedy play: Red, Orange, Blue, Light Blue, Pink, and Brown sit close together across the upper grid. Feeding a color with no open tube fills the conveyor with marbles that have nowhere to go.
Marble Sort Level 419 Step-by-Step Walkthrough
Sort the grid before you commit to it. Follow the release order.
Opening: read the tunnel, feed the open tubes
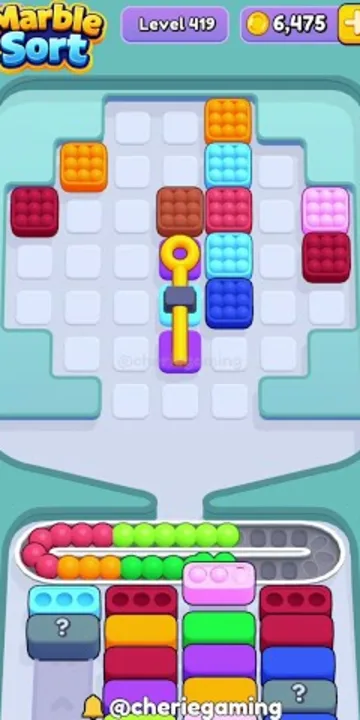
The recorded run opens with Cherie Gaming’s channel bumper before the board appears, and the level is shown mid-solve — the conveyor is already running and the upper grid is partially cleared. From that state the same opening discipline applies for the rest of the run: only feed colors whose receiver tube is actually taking marbles.
- Take stock of the center tunnel first. Note which stacks sit above its opening and which color waits at its base — that shaft determines your drop order for the whole level.
- Feed the colors already visible in the receiver tube sections, starting with the ones that sit closest to the tunnel’s exit. Light Blue, Orange, and Red all appear both on the grid and in the tubes, so they are your safest early targets.
- Clear a Red or Orange stack only when its tube is open in the front row; each stack drops as a batch, so a mistimed release jams the belt.
- Leave the Brown stack directly above the tunnel mouth alone until its tube is live — dropping it first seals the shaft with a color the receivers may not want yet.
- Do not tap any stack resting on a grey ”?” cover in the opening. Reveal those cells only when you have belt room and a matching tube in front.
Midgame: work the covers and chase the key
By the middle of the solve the grid has thinned and the tubes have started filling in rows. The remaining stacks sit higher up, the conveyor carries mixed batches toward the receivers, and the gold key becomes the main objective — it unlocks the covered cells that hold the level’s last colors.
- Play each stack into its matching tube as the front row cycles. When several stacks share a color, feed them back-to-back so the tube fills in one pass.
- Watch the tunnel’s base: every marble that enters the shaft exits in the same order, so queue your drops so the color at the bottom always matches the next open tube.
- Free the gold key the moment its lock cell is reachable. The key clears the grey lock base and opens the covered lower cells of the receivers.
- Once a ”?” cover is revealed, play the new color quickly if its tube is open; if not, leave the cell and come back on the next rotation.
- Handle the Purple at the tunnel’s base carefully — it sits at the shaft exit, so it is both your gateway and your bottleneck. Release it only when a Purple tube is front and center.
- Keep the conveyor moving in batches: when a tube opens, feed it every marble of its color that the belt already carries before adding anything new from the grid.
Cleanup: drain the tunnel and finish the tubes
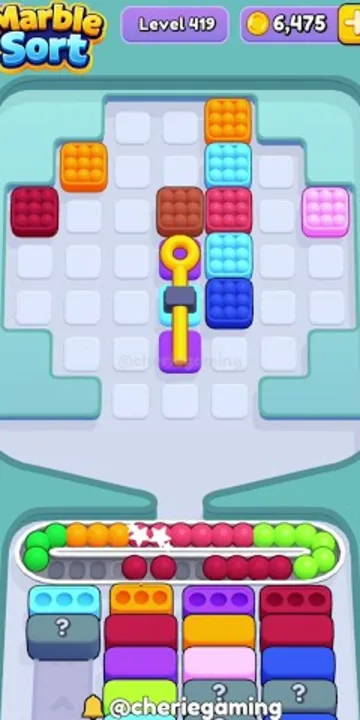
In the endgame the board is down to a handful of tall stacks scattered over the upper rows, with the tube receivers mostly filled and their bottom cells still covered. The finish is a matter of ordering the last drops through the center shaft.
- Work from the tunnel outward: clear the stacks nearest the shaft first so late marbles have a short, predictable ride to the belt.
- Play only to the active front row from here — every remaining stack has exactly one correct tube, and the conveyor will not sort it for you.
- Let the tube sections fill row by row. When a receiver’s covered bottom cell opens, feed that color immediately; it is usually the last one that tube needs.
- Cycle the final Light Blue, Orange, and Pink stragglers into their tubes as the belt delivers them, then drop the last stack above the tunnel. The level completes the moment the final tube cell fills.
Level 419 Tips Recap
- The yellow tunnel is a one-way shaft — read what is at its base before you drop anything above it.
- Feed only colors whose receiver tube is open; covered ”?” cells and locked tube bottoms are the board’s main traps.
- Free the gold key when it appears — it unlocks the covered lower cells that hold the last colors.
- In the endgame, clear the grid nearest the tunnel first and finish each tube row by row.
Related Articles
blog
Marble Sort Dispensers & Locks Guide: Key Order
Learn how Dispensers and Locks work in Marble Sort: find the hidden Key, use Pop-It and Numbered Dispensers without clogging the belt, and beat Level 805.
blog
Marble Sort Locked Pallet Guide: Key Queue Timing
Master the Locked Pallet in Marble Sort: how the key queue works, why keys ignore color, and the timing tricks that stop locked boxes from stalling your run.
blog
Marble Sort Mystery Box Guide: Reveal Before You Tap
Learn how the Marble Sort Mystery Box works: how it reveals its color as it moves forward, when it's safe to tap, and how to dodge the wrong-color trap.
Was this helpful?
Thanks for the feedback!