Marble Sort Level 216 Walkthrough & Solution
Marble Sort Level 216 walkthrough: unlock the key-and-lock tile grid, feed Yellow runs through the conveyor, and clear the hybrid tray step by step.
Levels · 216
Levels 460–460
Levels 487–487
Levels 500–500
Levels 517–517
Levels 550–550

Marble Sort Level 216 Walkthrough & Solution
Level 216 Board Overview: The Lock-and-Key Tray
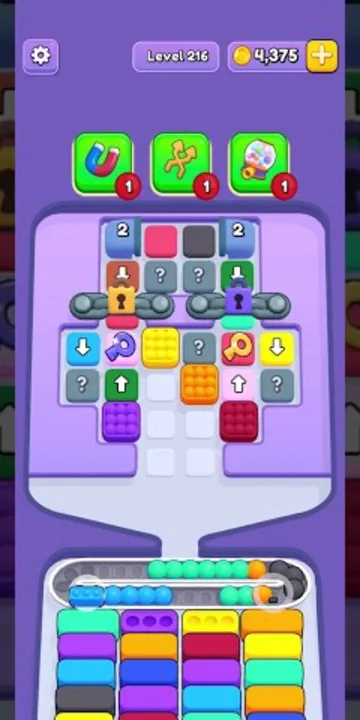
Level 216 opens as a hybrid board. The top half is a tile grid, not a row of bottles: four input columns at the top fan out into six across the middle, and the tiles are the puzzle — some carry arrows, some carry numbers, and some carry keys. A grey pipe row runs through the grid holding two locks, a Yellow lock on the left and a Purple lock on the right, and until the matching key tiles are delivered, whatever sits behind that pipe stays sealed. Down below, a conveyor feeds a set of marble tubes, with three empty receiver Boxes waiting at the base of the tray.
The colors that are safe to touch early are Light Blue and Green. Two Light Blue tiles in the top row are marked “2”, meaning they deliver two tiles at once, and a Green tile with an up arrow sits in the second row. Around them sit the traps: a Red and an Orange tile with arrows, several grey ’?’ mystery tiles scattered through the grid, and textured Yellow, Purple, and Light Pink tiles in the middle rows. A Purple tile carries a blue key and a Red tile carries a red key — those are the tools you need for the lock row, and they are one-shot.
The conveyor below the grid is the tempo setter. With only three Boxes open at the start, you cannot afford to feed colors that have no receiver. The opening is about restraint: clear the honest tiles, hold the key tiles, and let the lock row decide when the real board opens up.
The Trap in Marble Sort Level 216
The board is rigged to make you tap everything in reach. Here is the layout:
- The lock row seals the middle: a Yellow lock and a Purple lock sit in the grey pipe across the grid. Until matching key tiles are delivered, the tiles behind the pipe are unreachable, and the middle of the board stays dead.
- Key tiles are one-shot: the blue key rides a Purple tile and the red key rides a Red tile. Spend them on the wrong lock — or waste them into a Box — and the sealed row stays closed.
- Mystery ’?’ tiles are a gamble: several grey ’?’ tiles sit in the top and middle rows. Every tap is a reveal; the tile underneath could be exactly what an open Box wants, or dead weight.
- The “2” markers count double: the Light Blue tiles marked “2” deliver two tiles in one drop. They are the fastest way to clear space, so banking them into the wrong moment wastes the board’s best tempo tool.
- The conveyor jams on greed: only three Boxes are open at the start. Feed Red, Orange, Yellow, or Purple before their receivers cycle forward and the belt clogs before the opening clears.
Marble Sort Level 216 Step-by-Step Walkthrough
Restraint first, then the locks, then the drain. Follow the release order.
Opening: play the open colors
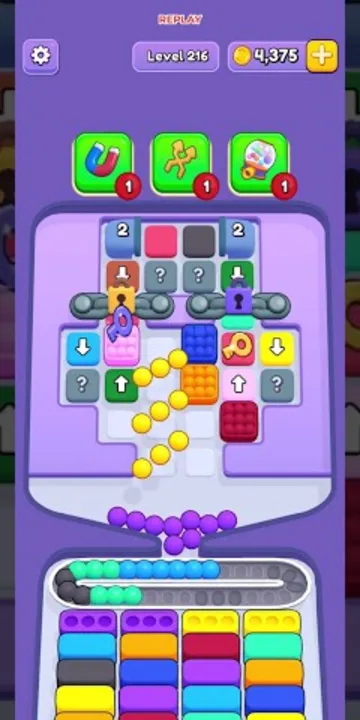
- Tap the Light Blue tiles into a Light Blue Box first. The two tiles marked “2” count double, so they clear grid space fast — take them as soon as a Light Blue Box sits in the front row.
- Feed Green next. The up-arrow Green tile in the second row is safe, and Green pairs with Light Blue as the only two opening colors with Boxes.
- Leave every grey ’?’ mystery tile alone. They sit in the top and middle rows, and nothing about the opening tells you what they hide.
- Do not touch the Red or Orange tiles yet. They carry keys or arrows, and no Box exists for them in the opening row.
- Keep the conveyor fed with Light Blue and Green only. With three Boxes open, a wrong color on the belt jams the whole line.
Midgame: spend the keys on the locks
By the middle of the solve the grid has thinned out and the bottom tubes are partially filled. The mid-solve frame shows Yellow as the biggest cluster, with Orange, Red, Dark Blue, Light Blue, and Light Purple grouped across the tubes, and lock-and-key tiles still cycling on the conveyor. The pipe row is now the gate to the rest of the board.
- Line up the key tiles with the two locks in the pipe row. When the blue key tile or red key tile reaches the front, spend it on its lock and the sealed tiles behind the pipe drop into play.
- Feed Yellow in runs. It is the largest visible cluster in the midgame, so clear it into the open Yellow Box before it stacks too high in the tubes.
- Group Orange, Red, and Dark Blue as their Boxes cycle forward. Keep each tube single-color — a mixed tube costs you a slot you cannot afford.
- Reveal the ’?’ mystery tiles one at a time now that more Boxes are open. Play the reveal only if its color matches an active Box; otherwise move to the next tile.
- Keep one tube open as a buffer. The conveyor feeds mixed colors, and a full set of tubes stalls the feed line just when the locks start opening.
Cleanup: drain the tray
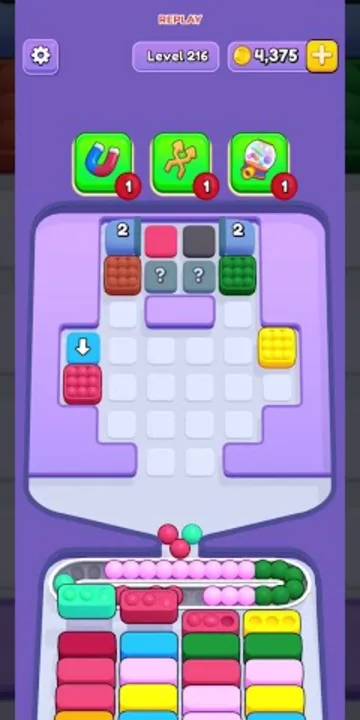
With the grid nearly empty, the level becomes a finishing line. The end frame is the replay screen that appears after the level completes — the board sits back on screen with the header showing the REPLAY label, so treat it as the post-solve recap rather than a board state to copy.
- Play only to the active front row now. Colors whose Boxes have already closed stop being fed.
- Let the conveyor cycle the last stragglers — the late Light Blues, Greens, and Yellow singles drop in as their Boxes open.
- Finish the lock row if any tile still sits sealed, and feed the remaining ‘2’ markers into the last open Boxes.
- The level completes the moment the last tile lands. Watch for the REPLAY screen to confirm the tray cleared.
Level 216 Tips Recap
- Feed only open colors: Light Blue and Green open the level; Red, Orange, and the textured tiles wait for their Boxes to cycle forward.
- Bank the “2”-marked Light Blue tiles — they deliver two tiles at once and are the fastest way to thin the grid.
- Spend each key tile on its lock in the pipe row; a sealed row keeps the middle of the board dead until you do.
- Reveal ’?’ mystery tiles only when the color underneath can drop, and always keep one tube free so the conveyor never jams.
Related Articles
blog
Marble Sort Dispensers & Locks Guide: Key Order
Learn how Dispensers and Locks work in Marble Sort: find the hidden Key, use Pop-It and Numbered Dispensers without clogging the belt, and beat Level 805.
blog
Marble Sort Locked Pallet Guide: Key Queue Timing
Master the Locked Pallet in Marble Sort: how the key queue works, why keys ignore color, and the timing tricks that stop locked boxes from stalling your run.
blog
Marble Sort Mystery Box Guide: Reveal Before You Tap
Learn how the Marble Sort Mystery Box works: how it reveals its color as it moves forward, when it's safe to tap, and how to dodge the wrong-color trap.
Was this helpful?
Thanks for the feedback!