Marble Sort Level 394 Walkthrough & Solution
Marble Sort Level 394 walkthrough: the Hard board narrows to a numbered center tower, and the '2' and '3' tiles dump extra marbles the moment you free them.
Levels · 394
Levels 460–460
Levels 487–487
Levels 500–500
Levels 517–517
Levels 550–550
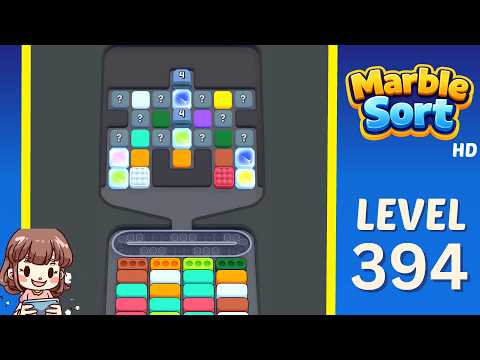
Marble Sort Level 394 Walkthrough & Solution
Level 394 Board Overview: The Numbered Center Tower

Level 394 is a Hard board, and it plays out around one structure: a tall center tower of marble blocks standing in the middle of the tray. The marbles ride in grouped blocks — two-tile and four-tile slabs on the grey grid — and the receiver Boxes below wait in stacked columns for the colors the blocks release. The footage opens with a channel bumper before the level itself appears, and once the board is up the tower dominates everything else.
By the time the flanking columns have cleared, the tray is down to three groups. A dark Purple four-block holds the far left, a Cyan four-block holds the far right, and between them the center tower stacks its layers top to bottom: a Light Blue tile marked with a “2”, then Green and Blue blocks, a second numbered tile marked “3”, and Orange seated at the base. The receiver stacks beneath ask for Light Pink, Red, Dark Green, Lime Green, Cyan, Orange, Blue, and Yellow, with the Light Pink and Green requests fronting the left stacks at this stage.
The numbered tiles are the level’s signature. Unlike plain blocks, the “2” and “3” tiles dump their full count of marbles in one drop, so freeing one feeds two or three marbles at once into whichever Box is open. That makes the tower both the fastest way to clear the board and the fastest way to jam the belt if you release a numbered tile into a closed Box.
The Trap in Marble Sort Level 394
The tray is rigged to punish anyone who strips the tower without watching the receivers. Here is the layout:
- The numbered tiles double your mistakes: the “2” and “3” tiles near the top of the tower release several marbles in a single tap. Free one while its color has no open Box and the belt jams two or three deep instead of one.
- The tower hides its useful colors under bait: Green, Blue, and Orange sit stacked in the middle of the column, but the requests that open the level are Light Pink and the Green family. Peel the tower top-down or you bury the colors the front Boxes actually want.
- The flanking blocks are one-way tickets: the far-left Purple block and the far-right Cyan block each feed a single request stream. Drop them before their Boxes cycle forward and you park a four-marble slab on the belt with nowhere to go.
- The endgame colors arrive late: Light Blue, Pink, Red, and Yellow still have marbles in play when the last Green and Orange requests are closing, so the finish line is tighter than the board looks.
Marble Sort Level 394 Step-by-Step Walkthrough
Respect the tower’s layer order. Follow the release sequence.
Opening: clear the flanks first
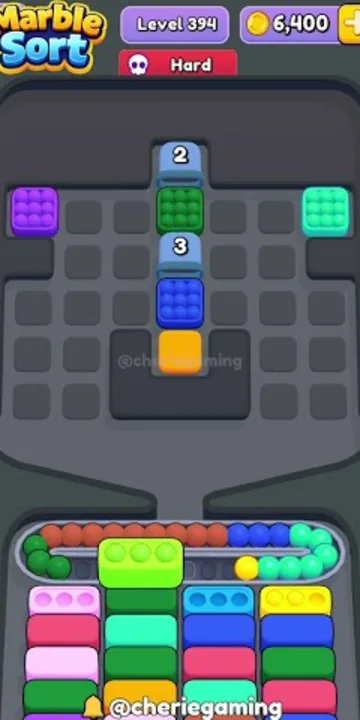
The flanking columns are the safe work of the level. Their colors are isolated, so each block feeds a small number of Boxes and clears out of the way quickly.
- Read the front receiver requests first and confirm which colors are open — Light Pink and the Green family front the left stacks early.
- Tap the far-left Purple four-block into its Box the moment a Purple request sits in the front row; a whole four-marble slab clears in one pass.
- Do the same on the far right with the Cyan four-block — feed it only while a Cyan Box is open, then let the column go empty.
- Keep the middle of the tray untouched while the flanks work. The tower releases several colors at once and deserves your full attention when it comes.
Midgame: strip the tower layer by layer
With the sides gone, the center tower is the whole level. The trick is to work top-down so each release lands in a Box that is actually open.
- Start at the top of the tower with the Light Blue tile. Do not tap it until a Light Blue or Blue request fronts a stack — if it is the numbered “2” tile, it will try to dump two marbles at once.
- Take the Green block next and feed it straight down into the Green-family Boxes. This is the layer that starts closing the left stacks for good.
- When the “3” numbered tile is exposed, time it like a combo: wait for its color to sit front and center, then release all three marbles into that Box in one drop.
- Clear the Blue layers below it the same way — Blue requests ride the middle stacks, so alternate between the tower and the receivers to keep the queue short.
- Leave Orange at the base of the tower for last. Orange Boxes sit low in the right-side stacks, so the color only becomes useful once the requests above it have been fed.
- Never peel a tower layer just because you can reach it. If the color it releases has no open Box, stop and let the receivers cycle instead.
Cleanup: feed the stragglers
The end frame catches the board in its final moments: the tray is down to scattered singles and short blocks, the receivers have closed out their Green and Orange stacks, and Light Blue, Pink, Red, Blue, and Yellow are still moving into the last open Boxes.
- Play only to the active front row from here — Light Blue, Pink, and Red are mid-transit toward the receivers, so feed them as their Boxes slide forward.
- Let the last Blue blocks and the Yellow base of the column finish their own stacks; do not chase a color whose receivers have already closed.
- Finish the final Boxes as the stragglers land. The level completes the moment the last marble drops, so keep the belt short and let the empties pull the remaining singles down on their own.

Level 394 Tips Recap
- The flanking Purple and Cyan blocks are the safe early clears — feed each one only while its Box is in the front row.
- The tower is a top-down job: Green and Blue come before Orange, which waits at the base until its low Boxes cycle forward.
- The numbered “2” and “3” tiles release several marbles in one tap — never free one into a closed Box.
- In the endgame only the Light Blue, Pink, Red, Blue, and Yellow stragglers remain; play to the front row and let the last stacks finish themselves.
Related Articles
blog
Marble Sort Video Walkthroughs — All Levels on YouTube
Every Marble Sort level 1-20 solved on video — the complete walkthrough series by Rock Gaming Channel, embedded level by level with links to the written guides.
level
Marble Sort Level 1 Walkthrough & Solution
Marble Sort Level 1 walkthrough: dodge the checkerboard bait, tap the front Yellow blockers first, and dig out the buried Light Blue clusters step by step.
level
Marble Sort Level 10 Walkthrough: Tunnel & Pink Bait
Marble Sort Level 10 walkthrough: dodge the double Pink bait, tick the Tunnel countdown down from 3, and survive the Light Blue wall step by step.
Was this helpful?
Thanks for the feedback!